Configure SAML single sign-on with JumpCloud

You can configure your ExtraHop system to enable users to log in to the system through the JumpCloud identity management service.

Before you begin

  • You should be familiar with administering JumpCloud.
  • You should be familiar with administering ExtraHop systems.

These procedures require you to copy and paste information between the ExtraHop system and JumpCloud, so it is helpful to have each system open side-by-side.

Enable SAML on the ExtraHop system

  1. Log in to the Administration settings on the ExtraHop system through https://<extrahop-hostname-or-IP-address>/admin.
  2. In the Access Settings section, click Remote Authentication.
  3. From the Remote authentication method drop-down list, select SAML.
  4. Click Continue.
  5. Click View SP Metadata. You will need to copy the ACS URL and Entity ID to paste into the JumpCloud configuration in the next procedure.

Configure SAML settings in JumpCloud

  1. Log in to the JumpCloud administrator console through https://console.jumpcloud.com/.
  2. In the left pane under User Authentication, click SSO.
  3. Click Add New Application.
  4. Click Custom SAML App.

  5. On the New SSO page, in the General Info section, type a name to identify the ExtraHop system in the Display Label field.
  6. Click the SSO tab and configure the following fields:

    IdP Entity ID:

    Type any string of characters. This ID is required when you configure the identity provider on the ExtraHop system.

    SP Entity ID: Type or paste the Entity ID from the ExtraHop system.

    ACS URLs: Type or paste the Assertion Consumer Service (ACS) URL from the ExtraHop system.

    SP Certificate: Leave this field empty to have JumpCloud generate a new certificate. Alternatively you can provide your own certificate.

    SAMLSubject NameID: Select email from the drop-down list.

    SAMLSubject NameID Format: Select urn:oasis:names:tc:SAML:2.0:nameid-format:persistent from the drop-down list.

    Signature Algorithm: Select RSA-SHA256 from the drop-down list.

    Default RelayState: Leave this field blank.

    Login URL: Leave this field blank.

    IdP URL: Type an identifying name in the field. The URL appears similar to the following example: https://sso.jumpcloud.com/saml2/extrahop.

  7. In the User Attribute Mapping section, click add attribute and type the following strings. These attributes identify the user throughout the ExtraHop system.
    Service Provider Attribute Name JumpCloud Attribute Name
    urn:oid:0.9.2342.19200300.100.1.3 email
    urn:oid:2.5.4.4 lastname
    urn:oid:2.5.4.42 firstname
  8. In the Group Attributes section, select include group attribute and type a name in the field to identify the group. You will specify this name when you configure user privilege attributes on the ExtraHop system.
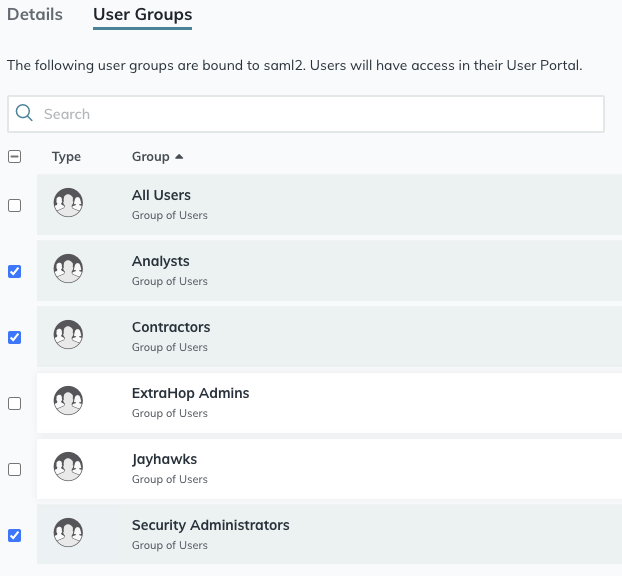
  9. Click the User Groups tab.
  10. Select all the groups that should have access to the ExtraHop system. Three groups are selected in the example below.
  11. Click activate.
  12. Click Continue to confirm the new settings.
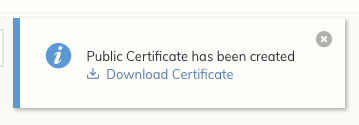
    JumpCloud generates a certificate after the application is created. Click Download Certificate and save the file to your computer.

Add identity provider information on the ExtraHop system

  1. Return to the Administration settings on the ExtraHop system. Close the Service Provider metadata window if it is still open, and then click Add Identity Provider.
  2. Type a unique name in the Provider Name field. This name appears on the ExtraHop system login page.
  3. From JumpCloud, copy the IdP Entity ID and paste into the Entity ID field on the ExtraHop system.
  4. From JumpCloud, copy the IDP URL and paste into the SSO URL field on the ExtraHop system.
  5. Open the certificate.pem file in a text editor, copy the certificate data, and paste into the Public Certificate field on the ExtraHop system.
  6. Choose how you would like to provision users from one of the following options.
    • Select Auto-provision users to create a new remote SAML user account on the ExtraHop system when the user first logs in to the system.
    • Clear the Auto-provision users checkbox and manually configure new remote users through the ExtraHop Administration settings or REST API.
  7. The Enable this identity provider option is selected by default and allows users to log in to the ExtraHop system. To prevent users from logging in, clear the checkbox.
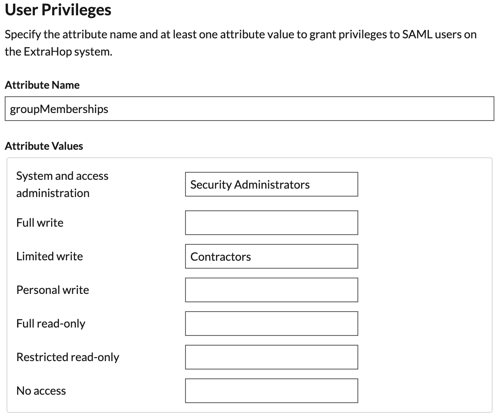
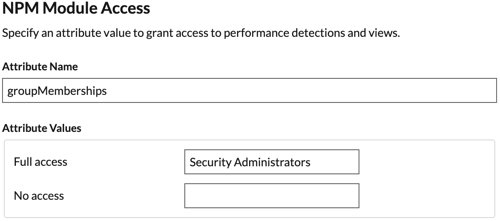
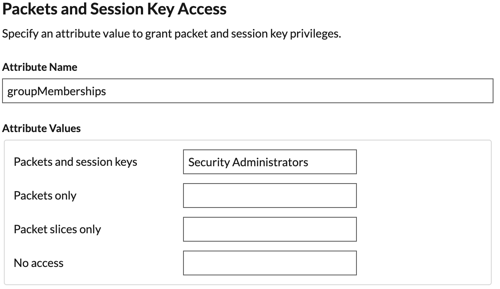
  8. Configure user privilege attributes. You must configure the following set of user attributes before users can log in to the ExtraHop system through an identity provider. Values are user-definable; however, they must match the attribute names that are included in the SAML response from your identity provider. Values are not case sensitive and can include spaces. For more information about privilege levels, see Users and user groups..
    Important:You must specify the attribute name and configure at least one attribute value other than No access to enable users to log in.
    In the example below, the Attribute Name field is the group attribute configured when creating the ExtraHop application on the identity provider and the Attribute Values are the names of your user groups. If a user is a member of more than one group, the user is granted the most permissive access privilege.
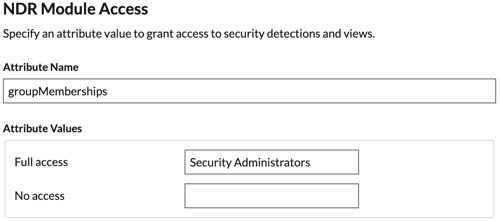
  9. Configure NDR module access.
  10. Configure NPM module access.
  11. (Optional): Configure packets and session key access. This step is optional and is only required when you have a connected packetstore.
  12. Click Save.
  13. Save the Running Config.

Log in to the ExtraHop system

  1. Log in to the ExtraHop system through https://<extrahop-hostname-or-IP-address>.
  2. Click Log in with <provider name>.
  3. Sign in to your provider with your email address and password. You are automatically directed to the ExtraHop Overview page.
Last modified 2024-04-01