Configure SAML single sign-on with Okta

You can configure your ExtraHop system to enable users to log in to the system through the Okta identity management service.

Before you begin

  • You should be familiar with administering Okta. These procedures are based on the Okta Classic UI. If you are configuring Okta through the Developer Console, the procedure might be slightly different.
  • You should be familiar with administering ExtraHop systems.

These procedures require you to copy and paste information between the ExtraHop system and the Okta Classic UI, so it is helpful to have each system open side-by-side.

Enable SAML on the ExtraHop system

  1. Log in to the Administration settings on the ExtraHop system through https://<extrahop-hostname-or-IP-address>/admin.
  2. In the Access Settings section, click Remote Authentication.
  3. From the Remote authentication method drop-down list, select SAML.
  4. Click Continue.
  5. Click View SP Metadata. You will need to copy the ACS URL and Entity ID to paste into the Okta configuration in the next procedure.

Configure SAML settings in Okta

This procedure requires you to copy and paste information between the ExtraHop Administration settings and the Okta Classic UI, so it is helpful to have each UI open side-by-side.

  1. Log in to Okta.
  2. In the upper-right corner of the page, change the view from Developer Console to Classic UI.
  3. From the top menu, click Applications.
  4. Click Add Application.
  5. Click Create New App.
  6. From the Platform drop-down list, select Web.
  7. For the Sign on method, select SAML 2.0.
  8. Click Create.
  9. In the General Settings section, type a unique name in the App name field to identify the ExtraHop system.
  10. (Optional): Configure the App logo and App visibility fields as required for your environment.
  11. Click Next.
  12. In the SAML Settings sections, paste the Assertion Consumer Service (ACS) URL from the ExtraHop system into the Single sign on URL field in Okta.
    Note:You might need to manually edit the ACS URL if the URL contains an unreachable hostname, such as the default system hostname extrahop. We recommend that you specify the fully qualified domain name for the ExtraHop system in the URL.
  13. Paste the SP Entity ID from the ExtraHop system into the Audience URI (SP Entity ID) field in Okta.
  14. From the Name ID format drop-down list, select Persistent.
  15. From the Application username drop-down list, select a username format.
  16. In the Attribute Statements section, add the following attributes. These attributes identify the user throughout the ExtraHop system.
    Name Name format Value
    urn:oid:0.9.2342.19200300.100.1.3 URI Reference user.email
    urn:oid:2.5.4.4 URI Reference user.lastName
    urn:oid:2.5.4.42 URI Reference user.firstName
  17. In the Group Attribute Statement section, type a string in the Name field and configure a filter. You will specify the group attribute name when you configure user privilege attributes on the ExtraHop system.
    The following figure shows a sample configuration.

  18. Click Next and then click Finish.
    You are returned to the Sign On settings page.
  19. In the Settings section, click View Setup Instructions.
    A new browser window opens and displays information that is required to configure the ExtraHop system.

Assign the ExtraHop system to Okta groups

We assume that you already have users and groups configured in Okta. If you do not, refer to the Okta documentation to add new users and groups.
  1. From the Directory menu, select Groups.
  2. Click the group name.
  3. Click Manage Apps.
  4. Locate the name of the application you configured for the ExtraHop system and click Assign.
  5. Click Done.

Add identity provider information on the ExtraHop system

  1. Return to the Administration settings on the ExtraHop system. Close the Service Provider metadata window if it is still open, and then click Add Identity Provider.
  2. Type a unique name in the Provider Name field. This name appears on the ExtraHop system login page.


  3. From Okta, copy the Identity Provider Single Sign-On URL and paste into the SSO URL field on the ExtraHop system.
  4. From Okta, copy the Identity Provider Issuer URL and paste into the Entity ID field on the ExtraHop system.
  5. From Okta, copy the X.509 certificate and paste into the Signing Certificate field on the ExtraHop system.
  6. Choose how you would like to provision users from one of the following options.
    • Select Auto-provision users to create a new remote SAML user account on the ExtraHop system when the user first logs in.
    • Clear the Auto-provision users checkbox and manually configure new remote users through the ExtraHop Administration settings or REST API. Access and privilege levels are determined by the user configuration in Okta.
  7. The Enable this identity provider option is selected by default and allows users to log in to the ExtraHop system. To prevent users from logging in, clear the checkbox.
  8. Configure user privilege attributes. You must configure the following set of user attributes before users can log in to the ExtraHop system through an identity provider. Values are user-definable; however, they must match the attribute names that are included in the SAML response from your identity provider. Values are not case sensitive and can include spaces. For more information about privilege levels, see Users and user groups.
    Important:You must specify the attribute name and configure at least one attribute value other than No access to enable users to log in.
    In the examples below, the Attribute Name field is the group attribute configured when creating the ExtraHop application on the identity provider and the Attribute Values are the names of your user groups. If a user is a member of more than one group, the user is granted the most permissive access privilege.
  9. (Optional): Configure packets and session key access. Configuring packets and session key attributes is optional and only required when you have a connected packetstore. Users with Unlimited, System Administration, or System and Access Administration (Reveal(x) 360) privileges are automatically granted access to packets and session keys.
  10. (Optional): Configure detections access. Configuring detections attributes is optional and only required when the global privilege policy is set to Only specified users can view detections. Users with unlimited or cloud setup (Reveal(x) 360) privileges are automatically granted access to detections.
  11. Click Save.
  12. Save the Running Config.

Log in to the ExtraHop system

  1. Log in to the ExtraHop system through https://<extrahop-hostname-or-IP-address>.
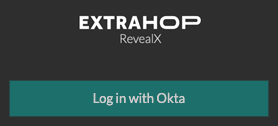
  2. Click Log in with <provider name>.
  3. Sign in to your provider with your email address and password. You are automatically directed to the ExtraHop Overview page.
Last modified 2023-11-07