Add storage capacity to the ExtraHop Trace appliance
Adding additional storage capacity to your Trace appliance enables you to store more packets and extend the amount of lookback available when running packet queries. You can safely add ExtraHop Extended Storage Units to a Trace appliance and retain all packets currently stored on the appliance.
Compatibility
| ExtraHop Trace Appliance | Extended Storage Unit |
|---|---|
| ETA 6150 |
You can attach a mix of 72 TB and 96 TB ESUs to the ETA 6150. |
| ETA 8250 |
|
| You can attach up to four ESUs to a Trace appliance. | |
Installation prerequisites
- ExtraHop Trace appliance with firmware 7.2 or later. Firmware 7.4 is required to encrypt the ESU. If you have not deployed the Trace appliance, follow the instructions in the Deploy the ExtraHop Trace 6150 Appliance and Deploy the ExtraHop Trace 8250 Appliance guides.
- ExtraHop license for the extended packetstore feature
- ExtraHop extended storage unit
- 2U of rack space and electrical connections for 2 x 600 W power supplies.
- Power cables
- SAS cables
- Rail kit
Set up the extended storage unit
- Install the extended storage unit in your data center with the included rack-mounting kit. The mounting kit supports most four-post racks with either round or square holes.
- Connect the power cables to the power supply units (PSUs).
Shut down the Trace appliance
- Log in to the Administration settings on the ExtraHop system through https://<extrahop-hostname-or-IP-address>/admin.
- In the Appliance Settings section, click Shutdown or Restart.
- In the Actions column, click Shutdown.
- On the confirmation page, click Shut down.
Connect the extended storage unit
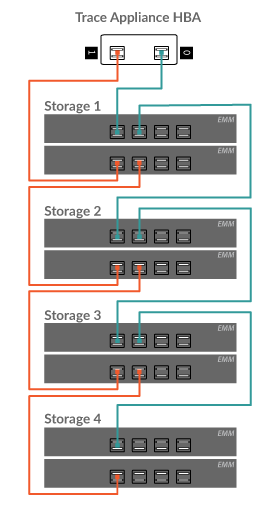
The extended storage unit connects to the Trace appliance through both of the two enclosure management modules (EMMs). Each EMM has four ports for connecting the SAS cables.
In a redundant configuration, the storage units are linked together in a series, with one of the extended storage units connected to both host bus adapter (HBA) ports on the Trace appliance, as shown in the following figure.
Attach the extended storage unit
-
Log in to the Administration settings.
Note: If the Trace appliance was previously encrypted, the packetstore is locked after the Trace appliance is powered on. The packetstore must be locked before you can attach the ESU to an encrypted Trace appliance. 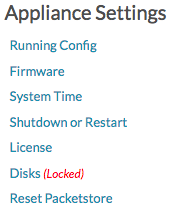
-
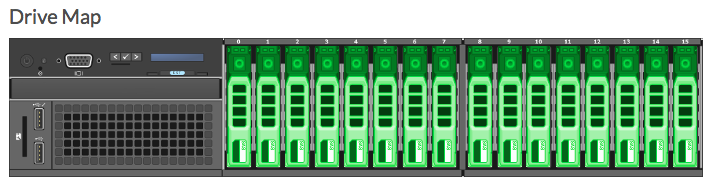
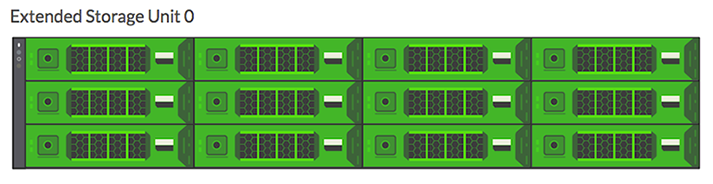
Confirm that all drives in the Drive Map section are colored green,
indicating they are healthy. If any disk is unhealthy, contact ExtraHop Support.
-
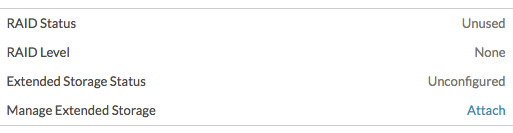
In the Unused Disks section for the extended storage
unit, click Attach, and then click
OK.
-
After the configuration is complete, confirm that all drives in the
extended storage unit are colored green, indicating they are healthy. If any
disk is unhealthy (yellow), contact ExtraHop Support.
Thank you for your feedback. Can we contact you to ask follow up questions?