Forward session keys to ExtraHop-managed sensors
The ExtraHop system can decrypt SSL/TLS traffic on your network with forwarded session keys from your servers deployed in AWS. Session key forwarding must be enabled on each ExtraHop-managed sensor, and you must create a VPC endpoint on each VPC that includes the servers that you want to forward encrypted traffic from.
Communication between the key forwarder and the sensor is encrypted with TLS 1.2.
Learn more about SSL/TLS decryption.
Enable session key forwarding in Reveal(x) 360
Session key forwarding can be enabled when you deploy ExtraHop-managed sensors from Reveal(x) 360. You must enable session key forwarding for each sensor.
- Log in to the Reveal(x) 360 Console.
-
Click System Settings
 and then click
All Administration.
- Click Deploy Sensors. Select the Enable session key forwarding on this sensor checkbox as you complete the deployment process.
- From the Sensors page, wait for the Status column to display Enabled and the Key Forwarding Endpoint column to display the endpoint string.
- Copy the endpoint string. The string is required when you create an endpoint in your VPC.
Configure security groups in AWS
Security groups determine which servers can forward session keys to the VPC endpoint as well as which session keys are accepted by the VPC endpoint. The following steps describe how to create the security group that permits inbound traffic to your VPC endpoint.
| Note: | Your AWS instances that are forwarding session keys must be configured with a security group that allows outbound traffic to the VPC endpoint. |
Create endpoint in a monitored VPC
Create an endpoint for each VPC that can accept forwarded session keys from your servers and send them to the VPC Endpoint Service in the Reveal(x) 360 system.
Install session key forwarding on servers
The following steps describe how to install and configure the ExtraHop session key forwarder software on supported Windows and Linux servers.
Before you begin
- Server instances must have an instance profile with an IAM role that grants permission to describe traffic mirror sessions (DescribeTrafficMirrorSessions) and traffic mirror targets (DescribeTrafficMirrorTargets). For more information about creating an instance profile, see the AWS documentation, Using an IAM role to grant permissions to applications running on Amazon EC2 instances.
Linux environment variables
| Variable | Description | Example |
|---|---|---|
| EXTRAHOP_CONNECTION_MODE | Specifies the connection mode to the session key receiver. Options are direct for self-managed sensors and hosted for ExtraHop-managed sensors. | sudo EXTRAHOP_CONNECTION_MODE=hosted rpm --install extrahop-key-forwarder.x86_64.rpm |
| EXTRAHOP_EDA_HOSTNAME | Specifies the fully qualified domain name of the self-managed sensor. | sudo EXTRAHOP_CONNECTION_MODE=direct EXTRAHOP_EDA_HOSTNAME=host.example.com dpkg --install extrahop-key-forwarder_amd64.deb |
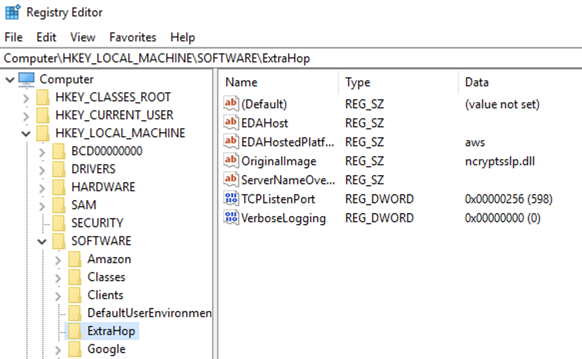
| EXTRAHOP_LOCAL_LISTENER_PORT | The key forwarder receives session keys locally from the Java environment through a TCP listener on localhost (127.0.0.1) and the port specified in the LOCAL_LISTENER_PORT field. We recommended that this port remain set to the default of 598. If you change the port number, you must modify the -javaagent argument to account for the new port. | sudo EXTRAHOP_CONNECTION_MODE=direct EXTRAHOP_EDA_HOSTNAME=host.example.com EXTRAHOP_LOCAL_LISTENER_PORT=900 rpm --install extrahop-key-forwarder.x86_64.rpm |
| EXTRAHOP_SYSLOG | Specifies the facility, or machine process, that created the syslog event. The default facility is local3, which is system daemon processes. | sudo EXTRAHOP_CONNECTION_MODE=direct EXTRAHOP_EDA_HOSTNAME=host.example.com EXTRAHOP_SYSLOG=local1 dpkg --install extrahop-key-forwarder_amd64.deb |
| EXTRAHOP_ADDITIONAL_ARGS | Specifies additional key forwarder options. | sudo EXTRAHOP_CONNECTION_MODE=hosted EXTRAHOP_ADDITIONAL_ARGS="-v=true -libcrypto=/some/path/libcrypto.so libcrypto=/some/other/path/libcrypto.so" rpm --install extrahop-key-forwarder.x86_64.rpm |
Validate the configuration settings
To validate that the ExtraHop system is able to receive forwarded keys, create a dashboard that identifies messages successfully received.
- Create a new dashboard.
- Click the chart widget to add the metric source.
- Click Add Source.
- In the Sources field, type Discover in the search field and then select Discover Appliance.
- In the Metrics field, type received messages in the search field and then select Key Receiver System Health - Received Messages Containing Keys.
- Click Save.
Additional system health metrics
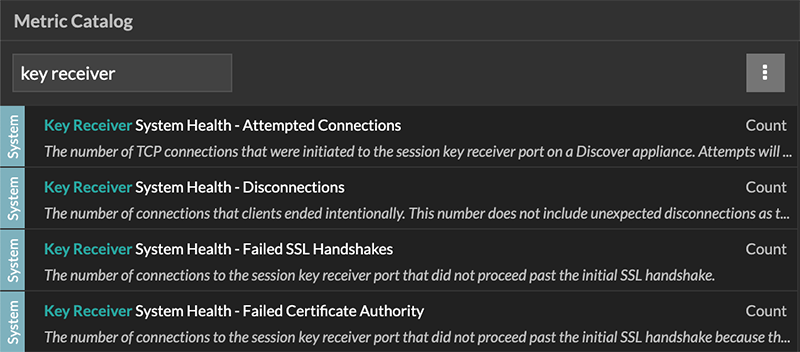
The ExtraHop system provides metrics that you can add to a dashboard to monitor session key forwarder health and functionality.
To view a list of available metrics, click the System Settings icon ![]() and then click
Metric Catalog. Type key receiver
in the filter field to display all available key receiver metrics.
and then click
Metric Catalog. Type key receiver
in the filter field to display all available key receiver metrics.

Learn how to Create a dashboard.

Thank you for your feedback. Can we contact you to ask follow up questions?