For the best performance, data redundancy, and stability, you must configure at least
three recordstores in a cluster.
| Important: | If you are creating a recordstore cluster
with six or more nodes, you must configure the cluster with manager nodes. For manager
node instructions, see Deploying manager nodes. |
In the following example, the recordstores have the following IP addresses:
- Node 1: 10.20.227.177
- Node 2: 10.20.227.178
- Node 3: 10.20.227.179
You will join nodes 2 and 3 to node 1 to create the recordstore cluster. All three
nodes are data nodes. You cannot join a data node to a manager node or join a
manager node to a data node to create a cluster.
| Important: | Each node that you join must have the same configuration
(physical or virtual) and the same ExtraHop firmware version. |
Before you begin
You must have already installed or provisioned the
recordstores in your environment before proceeding.
-
Log in to the Administration settings on all three recordstores with the setup
user account in three separate browser windows or tabs.
-
Select the browser window of node 1.
-
In the Status and Diagnostics section, click
Fingerprint and note the fingerprint value. You will
later confirm that the fingerprint for node 1 matches when you join the
remaining two nodes.
-
Select the browser window of node 2.
-
In the Explore Cluster Settings section, click
Join Cluster.
-
In the Host field, type the hostname or IP address of data
node 1 and then click Continue.
| Note: | For cloud-based deployments, be sure to type the IP address listed in the
Interfaces table on the Connectivity page. |
-
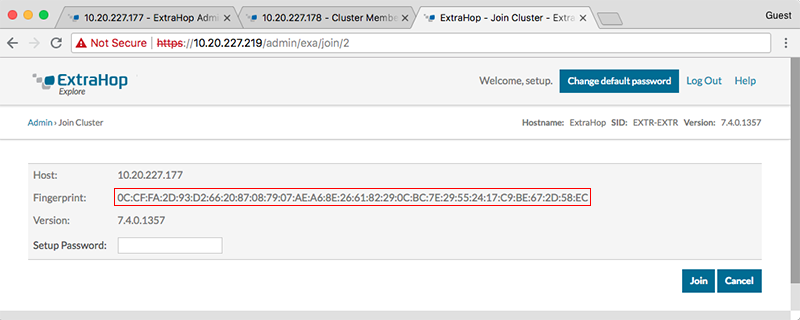
Confirm that the fingerprint on this page matches the fingerprint you noted in
step 3.
-
In the Setup Password field, type the password for the
node 1 setup user account and then click
Join.
When the join is complete, the Explore Cluster
Settings section has two new entries: Cluster
Members and Cluster Data
Management.
-
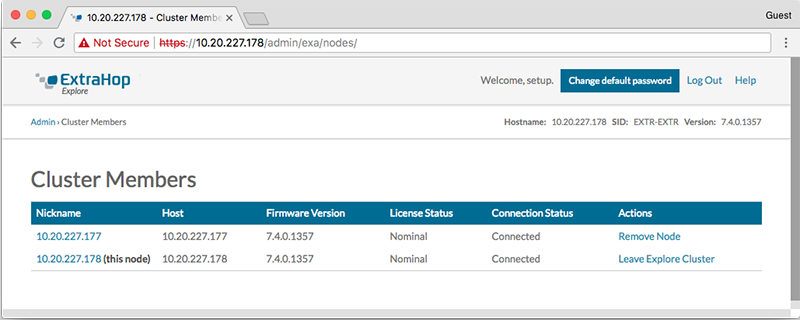
Click Cluster Members. You should see node 1 and node 2 in
the list.
-
In the Status and Diagnostics section, click
Explore Cluster Status. Wait for the
Status field to change to Green before
adding the next node.
-
Repeat steps 5 - 10 to join each additional node to the new cluster.
| Note: | To avoid creating multiple clusters, always join a new node to an existing
cluster and not to another single appliance. |
-
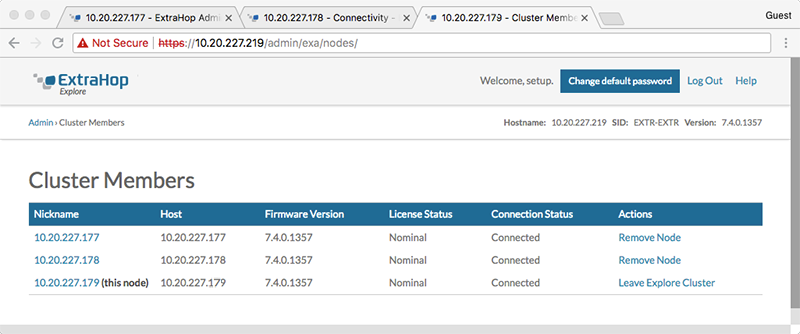
When you have added all of your recordstores to the cluster, click
Cluster Members in the Explore Cluster
Settings section. You should see all of the joined nodes in the
list, similar to the following figure.
-
In the Explore Cluster Settings section, click
Cluster Data Management and make sure that
Replication Level is set to 1
and Shard Reallocation is ON.


Thank you for your feedback. Can we contact you to ask follow up questions?