Deploy Reveal(x) Ultra in AWS
In this guide, you will learn how to deploy the ExtraHop Reveal(x) Ultra sensor through AWS Marketplace.
After you deploy the sensor, configure AWS traffic mirroring or remote packet capture (RPCAP) to forward traffic from remote devices to the sensor.
System requirements
Make sure you have everything you need to successfully deploy the sensor:
- An AWS account
- An ExtraHop Reveal(x) Ultra license or product key
- A VPC where the sensor will be deployed
- Two ENI subnets. One subnet to access the management interface of the sensor and one subnet that will forward traffic to the sensor. Both subnets must be in the same Availability Zone.
Deploy the sensor
-
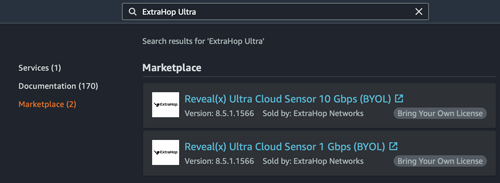
In Marketplace, search for ExtraHop Ultra sensors.
-
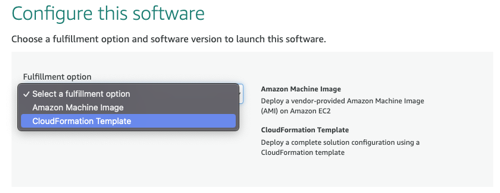
Select CloudFormation Template from the
Fulfillment option drop-down list.
-
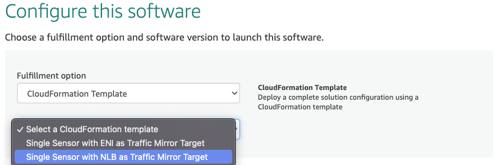
Select one of the following CloudFormation templates from the drop-down
list:
- Single sensor with ENI as traffic mirror target
- Single sensor with NLB as traffic mirror target. This option is recommended when you have more than ten traffic sources.
-
Select your AWS region from the Region drop-down list.

-
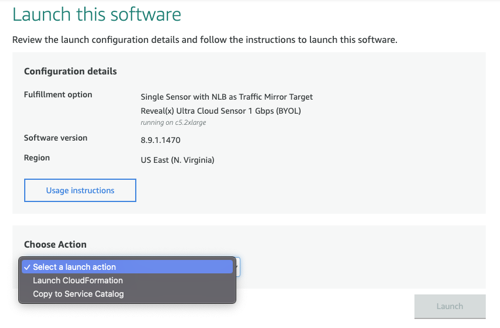
On the Launch this software page, under Choose Action, select Launch
CloudFormation.
-
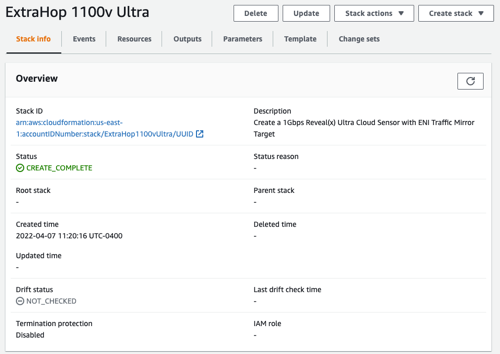
Wait for the creation to complete. The CREATE_COMPLETE status appears
on the Stack info page when the stack creation is successful.
-
Click the Outputs tab.

Next steps
- Register your ExtraHop system
- Configure the sensor network interfaces by clicking
Connectivity in the Administration settings. Ensure that
Management is selected on Interface 1. For Interface 2, choose
one of the following options:
- For the 1 Gbps sensor, select Management + RPCAP/ERSPAN/VXLAN/GENEVE Target.
- For the 10 Gbps sensor, select High-Performance ERSPAN/VXLAN/GENEVE Target.
Important: To ensure the best performance for initial device synchronization, connect all sensors to the console and then configure network traffic forwarding to the sensors. - (Recommended) configure AWS traffic mirroring or remote packet capture (RPCAP) to forward traffic from remote devices to the sensor.
- (Optional) Forward GENEVE-encapsulated traffic from an AWS Gateway Load Balancer.
- Complete the recommended procedures in the post-deployment checklist.
Create a traffic mirror target
Complete these steps for each ENI you created.
- Return to the AWS Management Console.
- From the top menu, click Services.
- In the Networking & Content Delivery section, click VPC.
- In the left pane, under Traffic Mirroring, click Mirror Targets.
-
Click Create traffic mirror target and complete the
following fields:
Option Description Name tag (Optional) Type a descriptive name for the target. Description (Optional) Type a description for the target. Target type Select Network Interface. Target Select the ENI you previously created. - Click Create.
Create a traffic mirror filter
You must create a filter to allow or restrict traffic from your ENI traffic mirror sources to your ExtraHop system. We recommend the following filtering rules to help avoid mirroring duplicate frames from peer EC2 instances that are in a single VPC to the sensor.
- All outbound traffic is mirrored to the sensor, whether the traffic is sent from one peer device to another on the subnet or if the traffic is sent to a device outside of the subnet.
- Inbound traffic is only mirrored to the sensor when the traffic is from an external device. For example, this rule ensures that an app server request is not mirrored twice: once from the sending app server and once from the database that received the request.
- Rule numbers determine the order in which the filters are applied. Rules with lower numbers, such as 100, are applied first.
| Important: | These filters should only be applied when mirroring all of the instances in a CIDR block. |
- In the AWS Management Console, in the left pane under Traffic Mirroring, click Mirror Filters.
-
Click Create traffic mirror filter and complete the following
fields:
Option Description Name tag Type a name for the filter. Description Type a description for the filter. Network services Select the amazon-dns checkbox. -
In the Inbound rules section, click Add
rule and then complete the following fields:
Option Description Number Type a number for the rule, such as 100. Rule action Select reject from the drop-down list. Protocol Select All protocols from the drop-down list. Source CIDR block Type the CIDR block for the subnet. Destination CIDR block Type the CIDR block for the subnet. Description (Optional) Type a description for the rule. -
In the Inbound rules section, click Add
rule again and then complete the following fields:
Option Description Number Type a number for the rule, such as 200. Rule action Select accept from the drop-down list. Protocol Select All protocols from the drop-down list. Source CIDR block Type 0.0.0.0/0. Destination CIDR block Type 0.0.0.0/0. Description (Optional) Type a description for the rule. -
In the Outbound rules section, click Add
rule and then complete the following fields:
Option Description Number Type a number for the rule, such as 100. Rule action Select accept from the drop-down list. Protocol Select All protocols from the drop-down list. Source CIDR block: Type 0.0.0.0/0. Destination CIDR block: Type 0.0.0.0/0. Description (Optional) Type a description for the rule. - Click Create.
Create a traffic mirror session
You must create a session for each AWS resource that you want to monitor. You can create a maximum of 500 traffic mirror sessions per sensor.
| Important: | To prevent mirror packets from being truncated, set the traffic mirror source interface MTU value to 54 bytes less than the traffic mirror target MTU value for IPv4 and 74 bytes less than the traffic mirror target MTU value for IPv6. For more information about configuring the network MTU value, see the following AWS documentation: Network Maximum Transmission Unit (MTU) for Your EC2 Instance. |
- In the AWS Management Console, in the left pane, under Traffic Mirroring, click Mirror Session.
-
Click Create traffic mirror session and complete the following
fields:
Option Description Name tag (Optional) Type a descriptive name for the session. Description (Optional) Type a description for the session Mirror source Select the source ENI. The source ENI is typically attached to the EC2 instance that you want to monitor. Mirror target Select the traffic mirror target ID generated for the target ENI. Session number Type 1. VNI Leave this field empty. Packet length Leave this field empty. Filter From the drop-down menu, select the ID for the traffic mirror filter you created. - Click Create.
Thank you for your feedback. Can we contact you to ask follow up questions?