Deploy an ExtraHop sensor on Hyper-V
The following procedures explain how to deploy a virtual ExtraHop sensors on the Microsoft Hyper-V platform. You must have experience administering your hypervisor product to complete these procedures.
An ExtraHop virtual sensor can help you to monitor the performance of your applications across internal networks, the public internet, or a virtual desktop interface (VDI), including database and storage tiers. The ExtraHop system can monitor application performance across geographically distributed environments, such as branch offices or virtualized environments through inter-VM traffic.
Virtual machine requirements
Your hypervisor must be able to support the following specifications for the virtual sensor.
- Hyper-V on Windows Server 2012 (or later) capable of hosting the virtual sensor
- Hyper-V Manager to manage the virtual machine
- (Optional) If you want to enable packet captures, configure an additional storage disk during deployment. Refer to your vendor documentation to add a disk.
- The following table provides the server hardware requirements for each sensor model:
| Sensor | CPU | RAM | Disk |
|---|---|---|---|
| EDA 1100v | 4 processing cores with hyper-threading support, VT-x or AMD-V technology, and 64-bit architecture. Streaming SIMD Extensions 4.2 (SSE4.2) and POPCNT instruction support. | 8 GB | 46 GB or higher disk (thick-provisioned) 250 GB or smaller disk for packet captures (thick-provisioned) |
- Do not change the default disk size on initial installation. Keeping the default disk size ensures correct lookback for ExtraHop metrics and proper system functionality. If your configuration requires a different disk size, contact your ExtraHop representative before changing.
- Do not migrate the VM. Although it is possible to migrate when the datastore is on a remote SAN, ExtraHop does not recommend this configuration.
| Important: | If you want to deploy more than one ExtraHop virtual sensor, create the new instance with the original deployment package or clone an existing instance that has never been started. |
Network requirements
Intra-VM: One 1 GbE network port is required (for management). The management port must be accessible on port 443.
External: Two 1 GbE network ports are required. One for the physical port mirror and one for management. The physical port mirror interface must be connected to the port mirror of the switch. While it is possible to configure a 10 GbE network port for the port mirror interface, it is not recommended as the virtual sensor cannot process more than 1 Gbps of traffic.
| Note: | All of the virtual NICs are configured in trunk mode by default. If you need to assign a specific VLAN to your management interface, you must modify the interface through PowerShell to change the management interface to access mode. |
| Important: | To ensure the best performance for initial device synchronization, connect all sensors to the console and then configure network traffic forwarding to the sensors. |
Install the files for Hyper-V
Before you begin
If you have not already done so, download the ExtraHop sensor firmware file for Hyper-V from the ExtraHop Customer Portal and extract the contents from the .zip file to your Windows Server machine.-
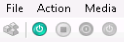
Click the green start button at the top of the screen and wait for the login
prompt.
Configure a static IP address through the CLI
The ExtraHop system is configured by default with DHCP enabled. If your network does not support DHCP, no IP address is acquired, and you must configure a static address manually.
| Important: | We strongly recommend configuring a unique hostname. If the system IP address changes, the ExtraHop console can re-establish connection easily to the system by hostname. |
- Access the CLI through an SSH connection, by connecting a USB keyboard and SVGA monitor to the physical ExtraHop appliance, or through an RS-232 serial (null modem) cable and a terminal emulator program. Set the terminal emulator to 115200 baud with 8 data bits, no parity, 1 stop bit (8N1), and hardware flow control disabled.
- At the login prompt, type shell and then press ENTER.
- At the password prompt, type default, and then press ENTER.
-
To configure the static IP address, run the following commands:
Configure the sensor
Before you begin
Before you can configure the sensor, you must have already configured a management IP address.Next steps
After the system is licensed, and you have verified that traffic is detected, complete the recommended procedures in the post-deployment checklist.Mirror Wire Data
This section includes procedures for mirroring data to your ExtraHop virtual appliance.
Mirroring internal and external traffic
The ExtraHop virtual sensor can be configured to monitor network traffic in the following network configuration examples. Each example requires a modification to the network configuration of its hypervisor host and specifies Network Adapter 1 as the management interface.
| Note: | Monitoring external network-mirrored traffic requires an external NIC and an associated virtual switch. |
Monitoring intra-VM traffic
The sensor can be configured to monitor network traffic of another VM on the same host by choosing Port Mirroring mode in the Hyper-V Manager. An ExtraHop virtual machine running in port mirroring mode can only monitor another virtual machine running on the same virtual switch.
Enable port mirroring mode in the Hyper-V manager
- Right-click the ExtraHop sensor VM and select Settings.
- Expand Network Adapter and click Advanced Features.
- In the Port mirroring section, click the Mirroring mode drop-down menu and select Source.
- Make note of the source network and ensure the capture interface on the ExtraHop VM is on the same network.
- Click Apply.
- Click OK.
- Repeat these steps for all the VMs you want to monitor, excluding the first VM you created in this procedure.
Monitoring external mirrored traffic to the VM
This scenario requires a second physical network interface and the creation of a second vSwitch associated with that NIC. This NIC then connects to a mirror, tap, or aggregator that copies traffic from a switch. This setup is useful for monitoring the intranet of an office.
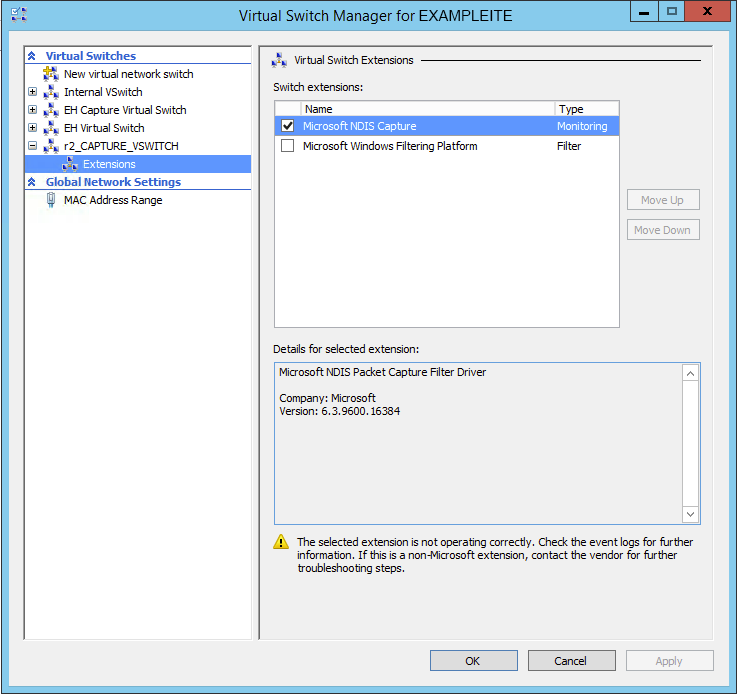
-
Expand the virtual switch associated with the external data feed and enable the
Microsoft NDIS Capture switch. You can ignore the
warning that the selected extension is not operating correctly.
Packet Forwarder
A packet forwarder forwards traffic from any host to the ExtraHop system. A packet forwarder is conceptually similar to a physical network tap, but implemented in software. In these topics and in the industry, this software is alternately referred to as a software tap, or sometimes RPCAP, which stands for Remote Packet Capture.
To implement the packet forwarder, ensure the following:
- You have administrative access to servers you want to monitor.
- You are running a 64-bit Linux or Windows OS (Windows Server 2008 R2 or 2012).
To ensure proper functionality of the ExtraHop virtual appliance:
- Ensure RPCAP is enabled on the ExtraHop virtual appliance. See the Configuring additional RPCAP settings section for optional settings.
- Install the packet forwarder on the servers sending traffic.
- Analyze traffic in the ExtraHop system.
Install the packet forwarder on a Linux server
You must install the packet forwarder software on each server to be monitored to forward packets to the ExtraHop system.
Download and install on Debian-based systems
To download and install the packet forwarder on Debian-based systems:
Download and install on other Linux systems
Install the packet forwarder on a Windows server
You must install the packet forwarder software on each server to be monitored in order to forward packets to the ExtraHop system.
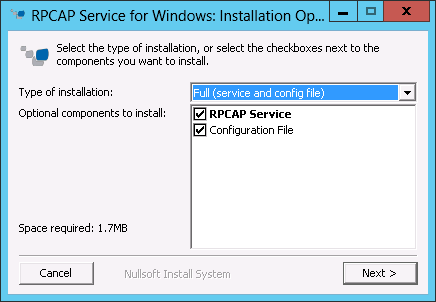
-
In the wizard, select the components to install.
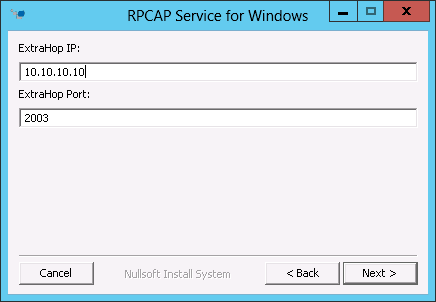
-
Complete the ExtraHop IP and ExtraHop
Port fields and click Next. The default
port is 2003.
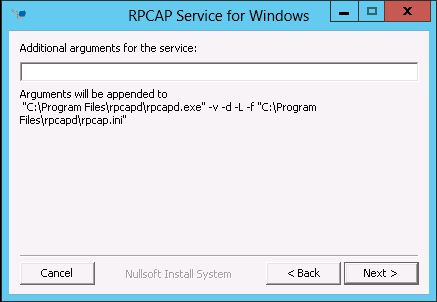
- (Optional):
Type additional arguments in the text box and click
Next.
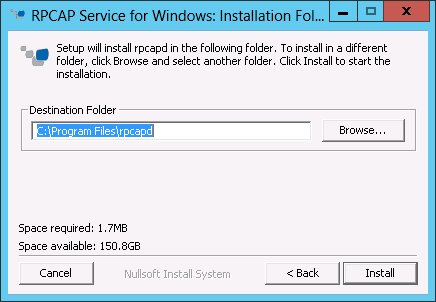
-
Browse to and select the destination folder to install RPCAP Service.
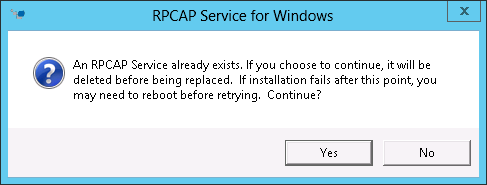
-
If RPCAP Service was previously installed, click Yes to
delete the previous service.
Monitoring multiple interfaces on a Linux server
For servers with multiple interfaces, you can configure the packet forwarder to forward packets from a particular interface or from multiple interfaces by editing its configuration file on the server.
To edit the configuration file, complete the following steps.
Monitoring multiple interfaces on a Windows server
For servers with multiple interfaces, you can configure the packet forwarder to forward packets from a particular interface or from multiple interfaces by editing its configuration file on the server.
To edit the configuration file, complete the following steps.
Configuring additional RPCAP settings
By default, the ExtraHop system accepts forwarded packets on port 2003. The servers using the software tap are directed to forward all traffic as denoted by the wildcard (*) in the Interface Address column.
To specify another port, complete the following steps.
Analyzing wire data from a packet forwarder
To find out how much wire data the ExtraHop system is receiving from the packet forwarder:
-
Click System Health to get more information about the
forwarded traffic. This page displays a Packets and Throughput graph for each
software tap connected to the ExtraHop system.

The RPCAP Packets and Throughput graphs contain four metrics:
- Encapsulation
- The total number of RPCAP encapsulation packets received by the ExtraHop system.
- Tunnel Eligible
- Total number of packets eligible to be forwarded to the ExtraHop system.
- Tunnel Sent
- Total number of RPCAP-tunneled packets forwarded to the ExtraHop system.
- Tunnel Received
- Total number of RPCAP-tunneled packets received by the ExtraHop system.
The tunnel eligible, tunnel sent, and tunnel received values are equal if the ExtraHop system is receiving and processing all the packets sent by the server. If the values are not equal, consider the following troubleshooting options:
- If Tunnel Sent is less than Tunnel Eligible, the server is not able to forward all of the traffic. This behavior might indicate that packet forwarding requires more processing or outbound bandwidth resources on the server. Consider separating the forwarding process to a separate CPU or allocating a dedicated interface for forwarding traffic.
- If Tunnel Received is less than Tunnel Sent, the ExtraHop system is not receiving all the traffic forwarded by the server. This behavior might be due to network congestion or insufficient resources on the ExtraHop system. If you suspect it is the latter, contact ExtraHop Support.
Removing the packet forwarder from a Linux server
- To stop and remove the software from a Debian-based Linux server, run
the following
commands:
sudo service rpcapd stop
sudo dpkg -r rpcapd
sudo dpkg --get-selections | grep rpcapd
You can also set the -P flag to completely remove the package from your system.
- To stop and remove the software from a RPM-based Linux server, run the
following
commands:
service rpcapd stop
rpm -e rpcapd-<extrahop_firmware_version>.x86_64
- To stop and remove the software tap from another Linux server, run the
following
commands:
sudo /etc/init.d/rpcapd stop
sudo update-rc.d -f rpcapd remove
sudo rm -rf /opt/extrahop
sudo rm -f /etc/init.d/rpcapd
Removing the packet forwader from a Windows server
To remove the software from a Windows server or your Windows desktop:
- Go to the Start Menu and select Control Panel.
- Select Uninstall a program.
- Select RPCAP Service for Windows.
- In the pop-up dialog box, click Remove.
- When the removal is complete, click Close.
Thank you for your feedback. Can we contact you to ask follow up questions?