Deploy the ExtraHop console on Hyper-V
The following procedures explain how to deploy an ExtraHop console on the Microsoft Hyper-V platform. You must have experience administering your hypervisor product to complete these procedures.
If you need either the installation package files or a license key for the virtual appliance, contact ExtraHop Support.
Virtual machine requirements
You must have an existing installation of Hyper-V on Windows Server 2012 (or later) capable of hosting the ExtraHop console. In addition, you need Hyper-V Manager to manage the virtual machine.
- CPU
- 2 CPUs with hyper-threading support, VT-x or AMD-V technology, 64-bit architecture, Streaming SIMD Extensions 4.2 (SSE4.2) support, and POPCNT instruction support.
- RAM
- 4 GB RAM
- Disk
- 44 GB or higher disk (thick-provisioned)
| Important: | If you want to deploy more than one ExtraHop virtual sensor, create the new instance with the original deployment package or clone an existing instance that has never been started. |
Performance guidelines
The performance of the virtual ExtraHop console depends on the number of sensors you are deploying in combination with the number of devices you expect the system to discover in your environment. To determine the appropriate sizing, see the Virtual ExtraHop Console Performance Guidelines.
Install the files for Hyper-V
Before you begin
If you have not already done so, download the ExtraHop console file for Hyper-V from the ExtraHop Customer Portal and extract the contents from the .zip file to your Windows Server machine.-
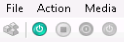
Click the green start button at the top of the screen and wait for the login
prompt.
Configure a static IP address through the CLI
The ExtraHop system is configured by default with DHCP enabled. If your network does not support DHCP, no IP address is acquired, and you must configure a static address manually.
| Important: | We strongly recommend configuring a unique hostname. If the system IP address changes, the ExtraHop console can re-establish connection easily to the system by hostname. |
- Access the CLI through an SSH connection, by connecting a USB keyboard and SVGA monitor to the physical ExtraHop appliance, or through an RS-232 serial (null modem) cable and a terminal emulator program. Set the terminal emulator to 115200 baud with 8 data bits, no parity, 1 stop bit (8N1), and hardware flow control disabled.
- At the login prompt, type shell and then press ENTER.
- At the password prompt, type default, and then press ENTER.
-
To configure the static IP address, run the following commands:
Post-deployment actions
Log in to the ExtraHop system with the setup user account and type default for the password.
- Review the Sensor and console post-deployment checklist and configure additional settings.
- Connect to a sensor from a RevealX Enterprise console
- Connect the EXA 5200 to the ExtraHop system
- Connect a packetstore to RevealX Enterprise
Thank you for your feedback. Can we contact you to ask follow up questions?