Add storage capacity to an ExtraHop packetstore
Adding storage capacity to your ExtraHop packetstore enables you to store more packets and extend the amount of lookback available when running packet queries. You can safely add ExtraHop Extended Storage Units (ESUs) to a packetstore and retain all packets currently stored on the packetstore.
Hardware specifications and compatibility
The ExtraHop Extended Storage Unit (ESU) is available in multiple configurations.
| Packetstore | ESU Product ID | Storage capacity | AC power supply units | Rack units | Maximum number of ESUs | Compatibility |
|---|---|---|---|---|---|---|
| ETA 8250 | MD1400 | 96 TB | 2 x 600 W | 2U | 4 | Supports only 96 TB MD1400 |
EDA 6370 ETA 9350 |
MD2412 | 240 TB | 2 x 800 W | 2U | 4 | Does not support mixing with MD260 |
| MD2460 | 1.2 PB | 2 x 1500 W Requires high line 200-240 VAC | 4U | 1 | Does not support mixing with MD2412 |
Installation prerequisites
Before connecting your extended storage unit (ESU), make sure you have the following items available:
- A deployed ExtraHop packetstore. If you have not deployed the packetstore, follow the instructions in the deployment guide for your packetstore.
- ExtraHop license for the extended packetstore feature
- ExtraHop extended storage unit (ESU)
- Power cables
- SAS cables shipped with the ESU
- Rack-mounting kit
Shut down the packetstore
- Log in to the Administration settings on the ExtraHop system through https://<extrahop-hostname-or-IP-address>/admin.
- In the Appliance Settings section, click Shutdown or Restart.
- In the Actions column, click Shutdown.
- On the confirmation page, click Shut down.
Enable the ESU
| Important: | This task only applies to the EFC 6370 sensor. |
- Log in to the Administration settings on the ExtraHop system through https://<extrahop-hostname-or-IP-address>/admin.
- In the Disks > External section, click Attach next to Manage Extended Storage.
Connect the extended storage unit
The extended storage unit (ESU) connects to the ExtraHop packetstore through both of the two enclosure management modules (EMMs). Each EMM has either two or four ports for connecting the SAS cables, but you should connect only two of these ports.
ESU connection guidelines
Follow these guidelines when connecting additional extended storage units (ESUs) to a packetstore.
-
Connectors on both ends of the SAS cable are universally keyed. You can connect either end of the cable to the enclosure management module (EMM) or the host bus adapter (HBA) on the packetstore.
-
Insert the SAS4 cable to the EMM until it is fully secured. The pull tab might be blue or white. Ensure that the SAS connector is oriented correctly, with the tab facing up.
- Insert the SAS cable into the HBA on the packetstore until it is fully secured. Ensure that the SAS connector is oriented correctly, with the tab facing down.
-
To remove the SAS4 cable, grasp the connector by the pull tab and pull to release the cable from the connector on the EMM and the packetstore.
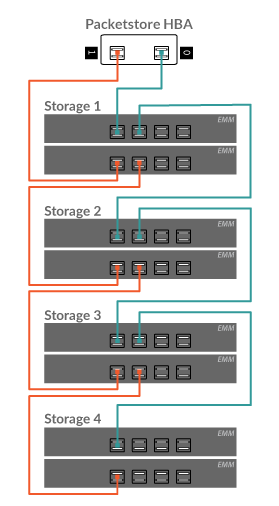
In a redundant configuration, the storage units are linked together in a series, with one of the extended storage units connected to both HBA ports on the packetstore.
Example of ETA 8250 with MD1400 SAS4 redundant-path cabling
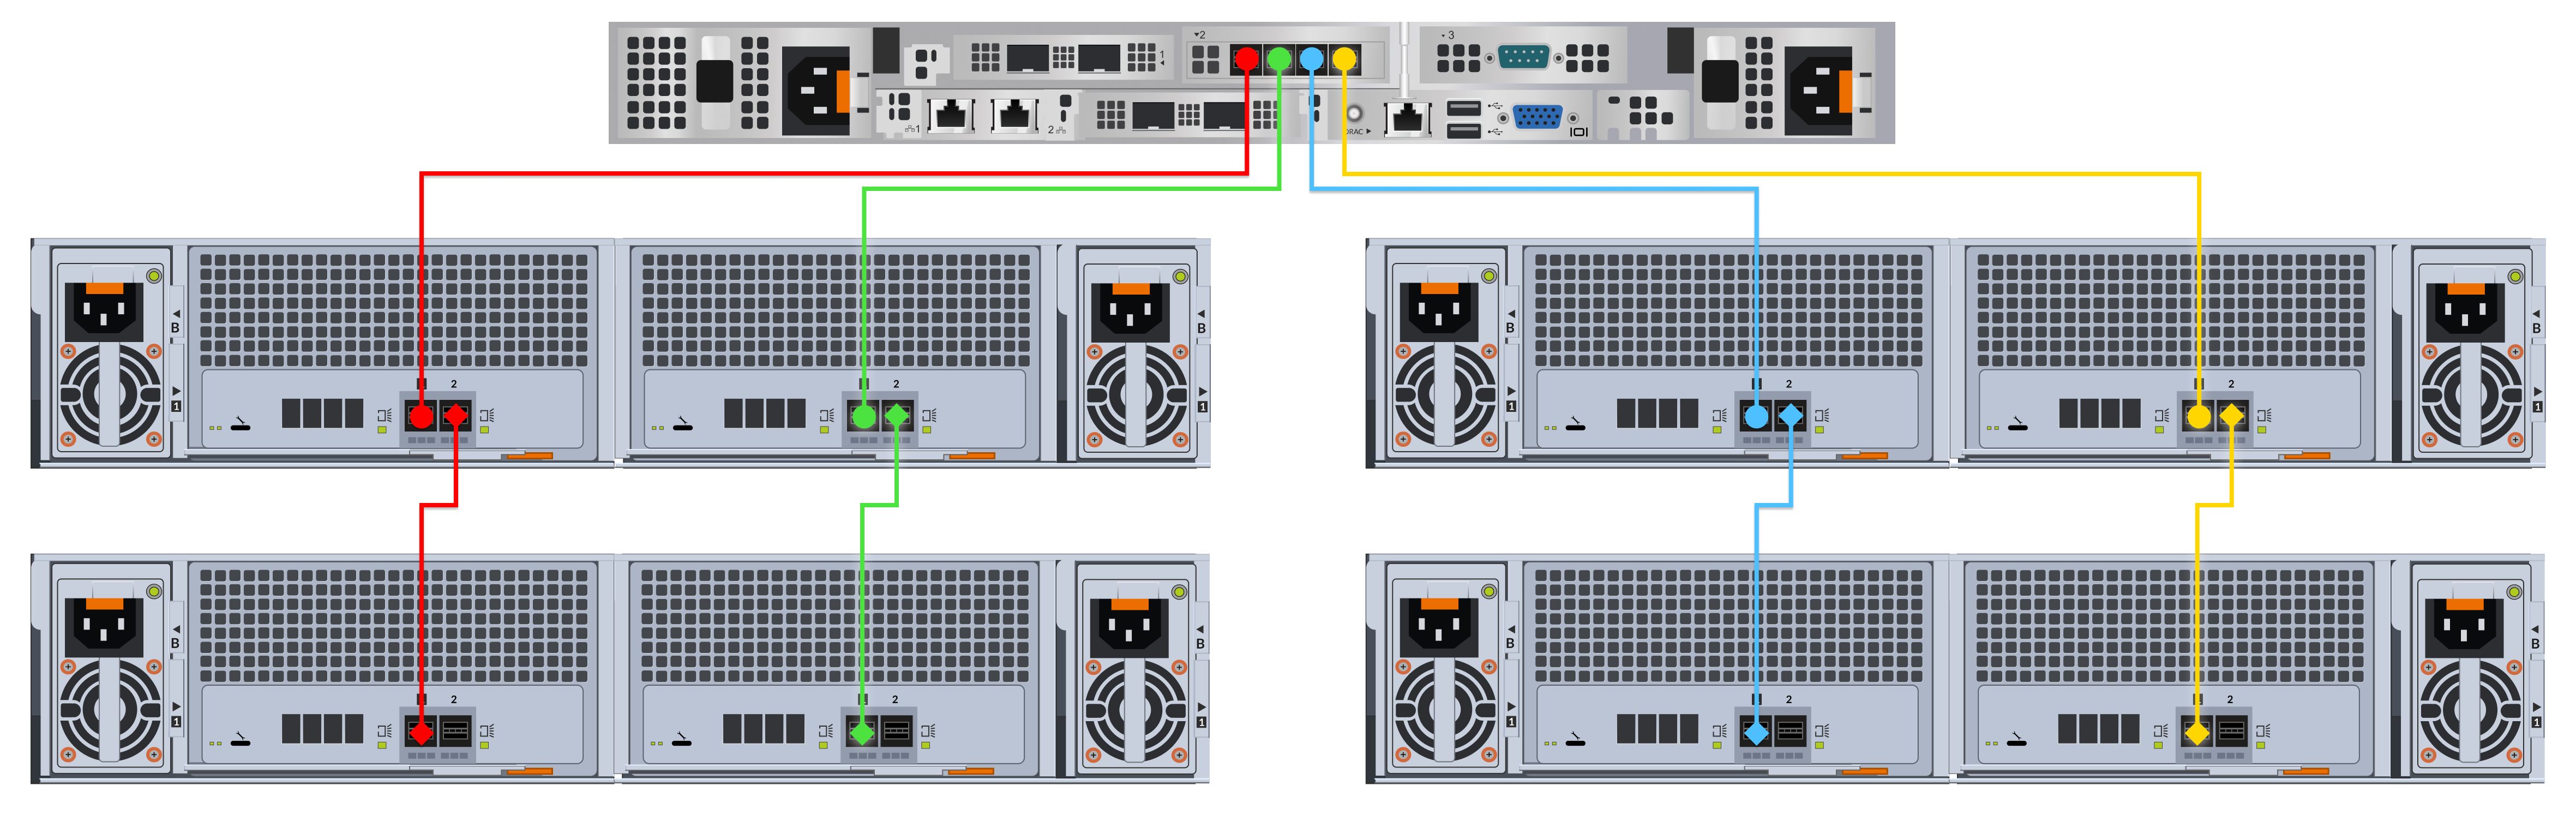
Example of ETA 9350 with MD2412 SAS4 redundant-path cabling
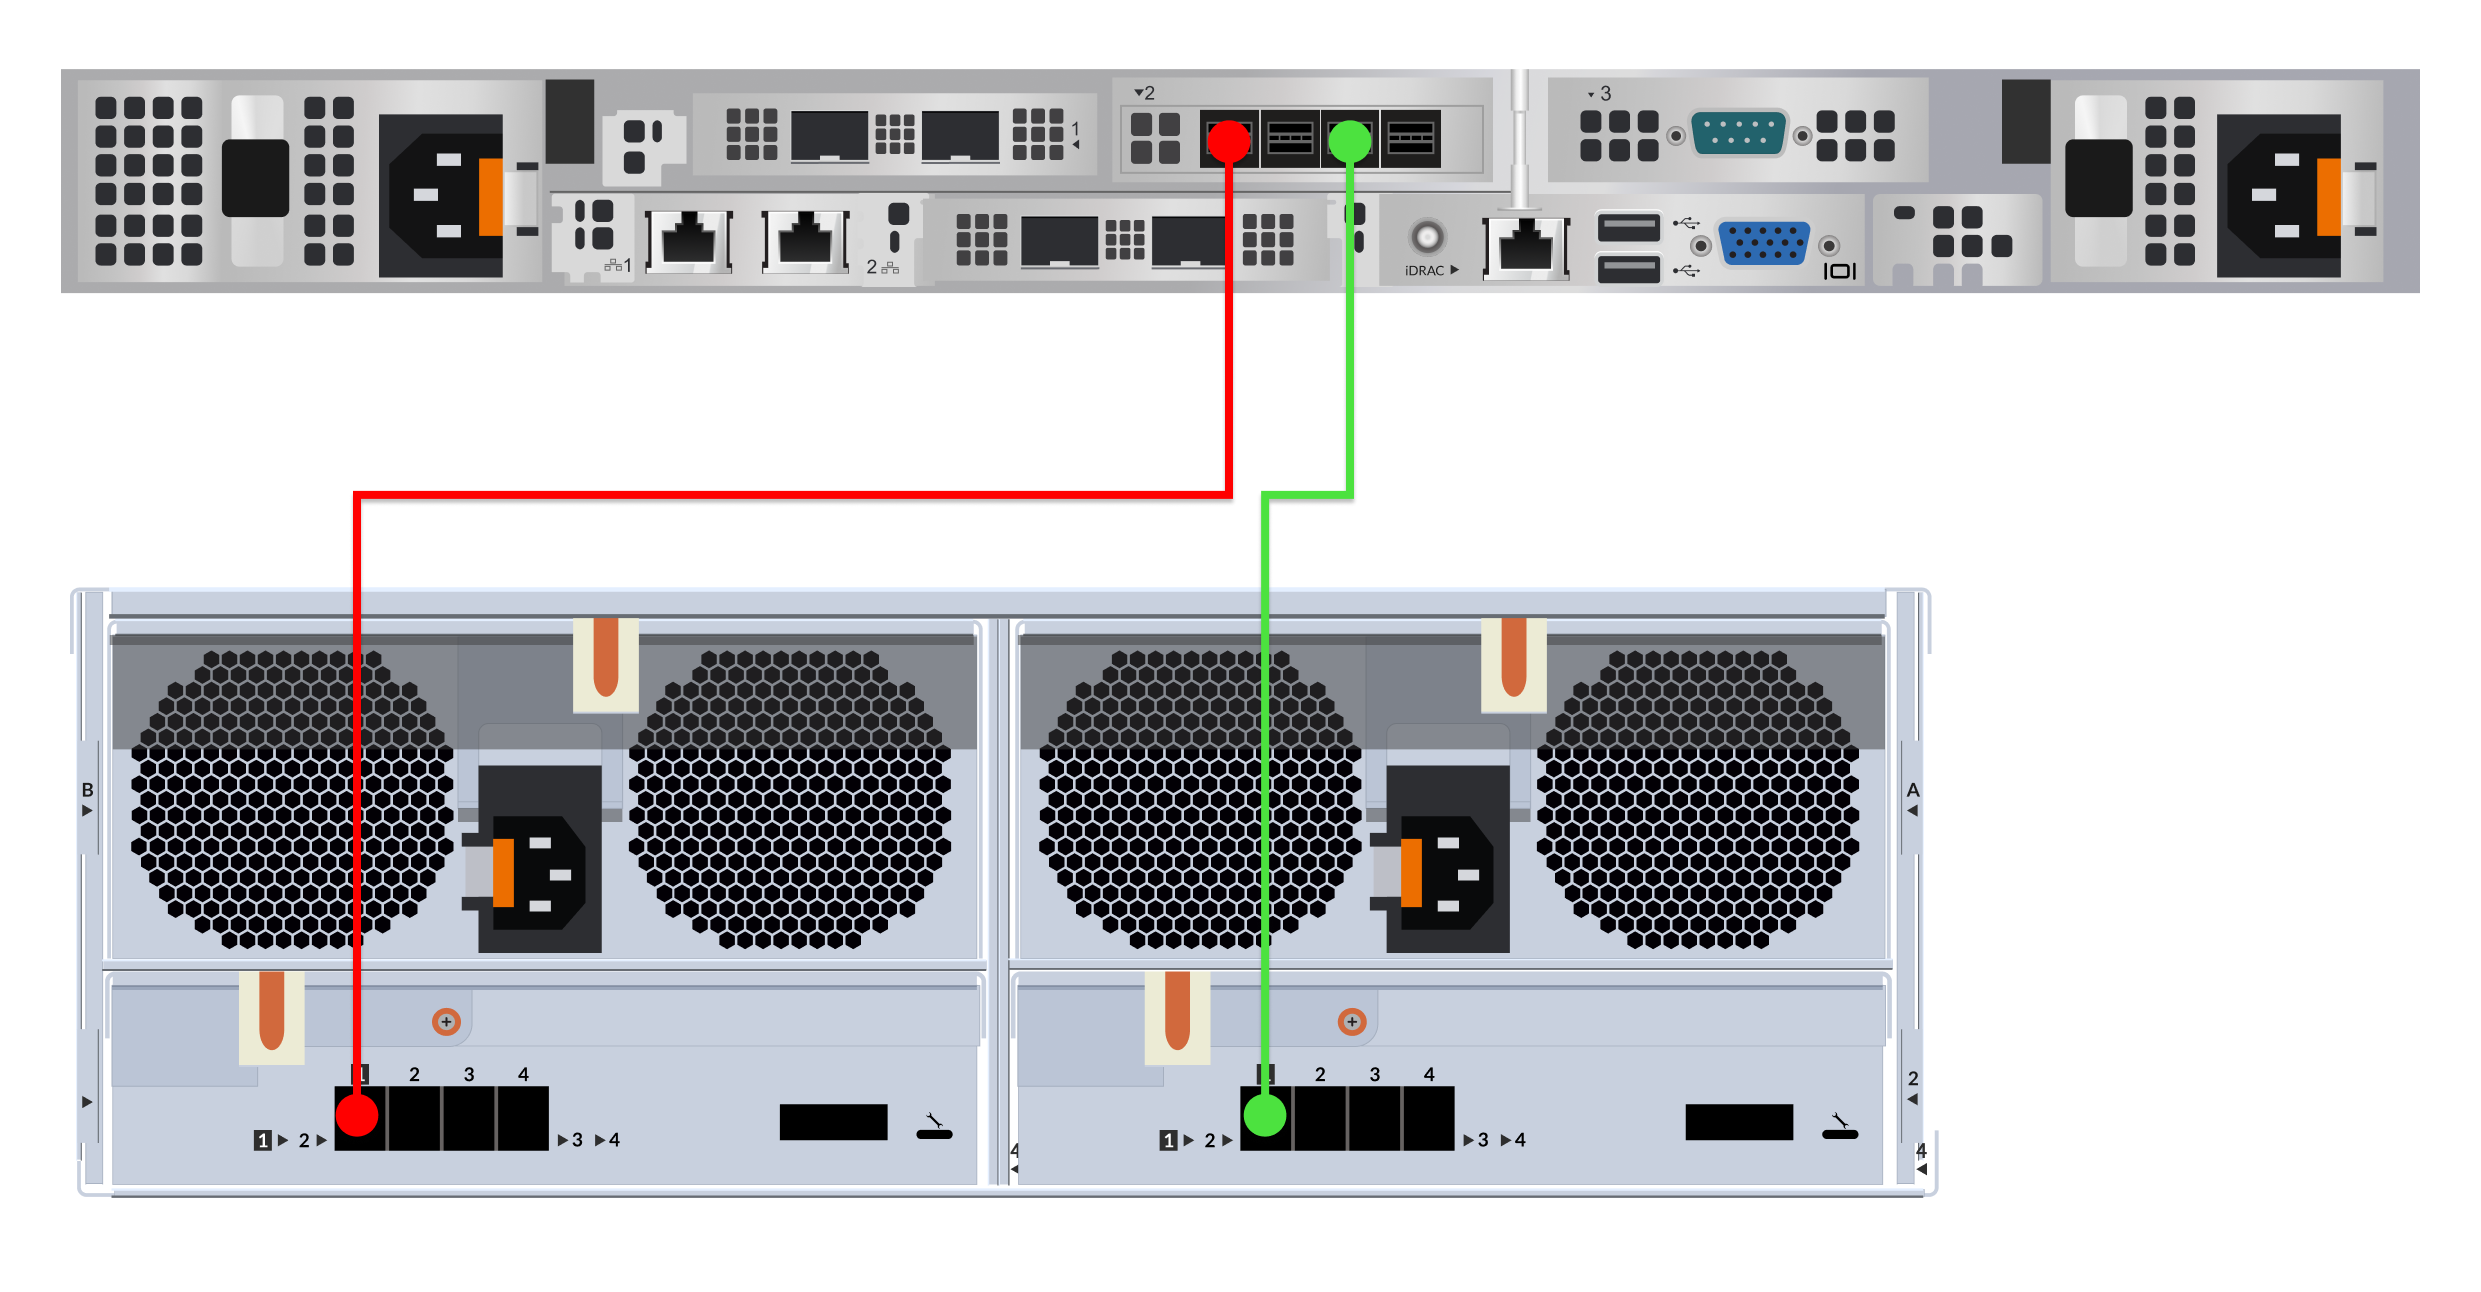
Example of ETA 9350 with MD2460 SAS4 redundant-path cabling
Attach the extended storage unit
-
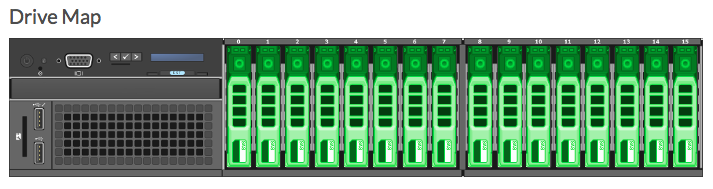
Confirm that all drives in the Drive Map section are colored green, indicating
they are healthy.
If any disk is unhealthy, contact ExtraHop Support.
Example Drive Maps

-
After the configuration is complete, confirm that all drives in the ESU are
colored green, indicating they are healthy.
If any disk is unhealthy (yellow), contact ExtraHop Support.
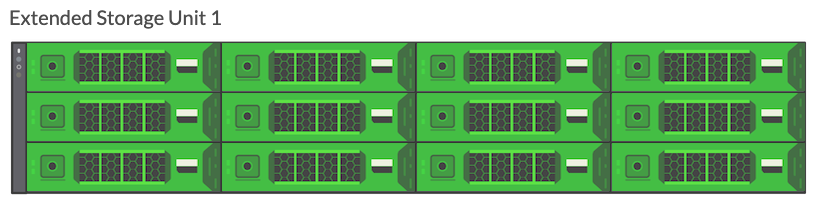
An example ESU
Next steps
If the packetstore is locked, you must unlock it from the Packetstore Encryption Settings page before the ESU can be encrypted and new packets can be stored.
Thank you for your feedback. Can we contact you to ask follow up questions?