Install the ExtraHop session key forwarder on a Linux server
Perfect Forward Secrecy (PFS) is a property of secure communication protocols that enables short-term, completely private session key exchanges between clients and servers. ExtraHop offers session key forwarding software that can send session keys to the ExtraHop system for SSL/TLS decryption. Communication between the key forwarder and the sensor is encrypted with TLS 1.2 or TLS 1.3, and there is no limit to the number of session keys that the ExtraHop system can receive.
| Note: | For more information about how the traffic feed or changes to the configuration might affect sensors, review the desync and capture drop rate metrics in the System Health dashboard. |
You must configure the ExtraHop system for session key forwarding and then install the forwarder software on the Windows and Linux servers that have the SSL/TLS traffic that you want to decrypt.
Before you begin- Read about SSL/TLS decryption and review the list of supported cipher suites.
- Make sure that the ExtraHop system is licensed for SSL Decryption and SSL Shared Secrets.
- Make sure that your server environment is supported by the ExtraHop session key
forwarder software:
- Microsoft Secure Channel (Schannel) security package
- Java SSL/TLS (Java versions 8 through 17). Do not upgrade to this version of the session key forwarder if you are currently monitoring Java 6 or Java 7 environments. Version 7.9 of the session key forwarder supports Java 6 and Java 7, and is compatible with the latest ExtraHop firmware.
- Dynamically linked OpenSSL (1.0.x and 1.1.x) libraries. OpenSSL is only supported on Linux systems with kernel versions 4.4 and later and RHEL 7.6 and later.
- Make sure the server where you install the session key forwarder trusts the SSL certificate of the ExtraHop sensor.
- Make sure your firewall rules allow connections to be initiated by the monitored server to TCP port 4873 on the sensor.
| Important: | The ExtraHop system cannot decrypt TLS-encrypted TDS traffic through session key forwarding. Instead, you can upload an RSA private key. |
- Install the session key forwarder on RHEL, CentOS, Fedora, or Debian-Ubuntu Linux distributions. The session key forwarder might not function correctly on other distributions.
- The session key forwarder has not been extensively tested with SELinux and might not be compatible when enabled on some Linux distributions.
Enable the SSL session key receiver service
You must enable the session key receiver service on the ExtraHop system before the system can receive and decrypt session keys from the session key forwarder. By default, this service is disabled.
Add a global port to protocol mapping
Add each protocol for the traffic that you want to decrypt with your session key forwarders.
- Log in to the Administration settings on the ExtraHop system through https://<extrahop-hostname-or-IP-address>/admin.
- In the System Configuration section, click Capture.
- Click SSL Decryption.
- In the Private Key Decryption section, clear the Require Private Keys checkbox.
- In the Global Protocol to Port Mapping section, click Add Global Protocol.
- From the Protocol drop-down list, select the protocol for the traffic that you want to decrypt.
- In the Port field, type the number of the port. Type 0 to add all ports.
- Click Add.
Install the software
RPM-based distributions
| Tip: | You can install the forwarder without user interaction by specifying environment variables in the installation command. |
Debian-Ubuntu distributions
| Tip: | You can install the forwarder without user interaction by specifying environment variables in the installation command. |
Integrate the forwarder with the Java-based SSL application
As an example, many Tomcat environments support customization of Java options in the /etc/default/tomcat7 file. In the following example, adding the -javaagent option to the JAVA_OPTS line causes the Java runtime to share SSL session secrets with the key forwarder process, which then relays the secrets to the ExtraHop system so that the secrets can be decrypted.
JAVA_OPTS="... -javaagent:/opt/extrahop/lib/exagent.jar
If your server is running Java 17 or later, you must also allow the sun.security.ssl module to access all unnamed modules with the --add-opens option, as shown in the following example:
JAVA_OPTS="... -javaagent:/opt/extrahop/lib/exagent.jar --add-opens java.base/sun.security.ssl=ALL-UNNAMED
Validate and troubleshoot your installation
If your Linux server has network access to the ExtraHop system and the server SSL configuration trusts the certificate presented by the ExtraHop system that you specified when you installed the session key forwarder, then the configuration is complete.
In cases where you might have problems with the configuration, the session key forwarder binary includes a test mode you can access from the command-line to test your configuration.
(Optional) Configure a server name override
If there is a mismatch between the ExtraHop system hostname that the forwarder knows (SERVER) and the common name (CN) that is presented in the SSL certificate of the ExtraHop system, then the forwarder must be configured with the correct CN.
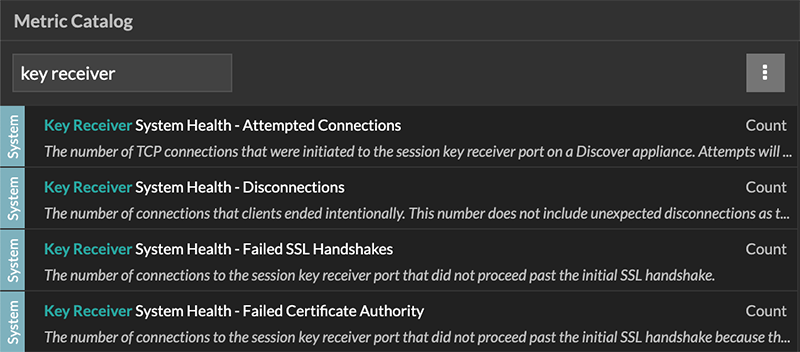
Key receiver system health metrics
The ExtraHop system provides key receiver metrics that you can add to a dashboard chart to monitor key receiver health and functionality.
To view a list of available metrics, click the System
Settings icon ![]() and
then click Metric Catalog. Type key
receiver in the filter field to display all available key receiver
metrics.
and
then click Metric Catalog. Type key
receiver in the filter field to display all available key receiver
metrics.
| Tip: | To learn how to create a new dashboard chart, see Edit a chart with the Metric Explorer. |
View connected session key forwarders
You can view recently connected session key forwarders after you install the session key forwarder on your server and enable the SSL session key receiver service on the ExtraHop system. Note that this page only displays session key forwarders that have connected over the last few minutes, not all session key forwarders that are currently connected.
- Log in to the Administration settings on the ExtraHop system through https://<extrahop-hostname-or-IP-address>/admin.
- In the System Configuration section, click Capture.
- Click SSL Shared Secrets.
Uninstall the software
If you no longer want the ExtraHop session key forwarder software installed, complete the following steps.
- Log in to the Linux server.
-
Open a terminal application and choose one of the following options to remove
the software.
- For RPM-based servers, run the following
command:
sudo rpm --erase extrahop-key-forwarder
- For Debian and Ubuntu servers, run the following
command:
sudo apt-get --purge remove extrahop-key-forwarder
Type Y at the prompt to confirm the software removal and then press ENTER.
- For RPM-based servers, run the following
command:
- Click Yes to confirm.
- After the software is removed, click Yes to restart the system
Common error messages
Errors created by the session key forwarder are logged to the Linux system log file.
| Message | Cause | Solution |
|---|---|---|
| connect: dial tcp <IP address>:4873: connectex: A connection attempt failed because the connected party did not properly respond after a period of time, or established connection failed because connected host has failed to respond | The monitored server cannot route any traffic to the sensor. | Ensure firewall rules allow connections to be initiated by the monitored server to TCP port 4873 on the sensor. |
| connect: dial tcp <IP address>:4873: connectex: No connection could be made because the target machine actively refused it | The monitored server can route traffic to the sensor, but the receiving process is not listening. | Ensure that the sensor is licensed for both the SSL Decryption and SSL Shared Secrets features. |
| connect: x509: certificate signed by unknown authority | The monitored server is not able to chain up the sensor certificate to a trusted Certificate Authority (CA). | Ensure that the Linux certificate store for the computer account has trusted root certificate authorities that establish a chain of trust for the sensor. |
| connect: x509: cannot validate certificate for <IP address> because it doesn't contain any IP SANs | An IP address was supplied as the SERVER parameter when installing the forwarder, but the SSL certificate presented by the sensor does not include an IP address as a Subject Alternate Name (SAN). | Select from the following three solutions.
|
|
||
|
Supported SSL/TLS cipher suites
The ExtraHop system can decrypt SSL/TLS traffic that has been encrypted with PFS or RSA cipher suites. All supported cipher suites can be decrypted by installing the session key forwarder on a server and configuring the ExtraHop system.
Cipher suites for RSA can also decrypt the traffic with a certificate and private key—with or without session key forwarding.
Decryption methods
- PFS + GPP: the ExtraHop system can decrypt these cipher suites with session key forwarding and global protocol to port mapping
- PFS + Cert: the ExtraHop system can decrypt these cipher suites with session key forwarding and the certificate and private key
- RSA + Cert: the ExtraHop system can decrypt these cipher suites without session key forwarding as long as you have uploaded the certificate and private key
| Hex Value | Name (IANA) | Name (OpenSSL) | Supported Decryption |
|---|---|---|---|
| 0x04 | TLS_RSA_WITH_RC4_128_MD5 | RC4-MD5 | PFS + GPP PFS + Cert RSA + Cert |
| 0x05 | TLS_RSA_WITH_RC4_128_SHA | RC4-SHA | PFS + GPP PFS + Cert RSA + Cert |
| 0x0A | TLS_RSA_WITH_3DES_EDE_CBC_SHA | DES-CBC3-SHA | PFS + GPP PFS + Cert RSA + Cert |
| 0x16 | TLS_DHE_RSA_WITH_3DES_EDE_CBC_SHA | EDH-RSA-DES-CBC3-SHA | PFS + GPP PFS + Cert |
| 0x2F | TLS_RSA_WITH_AES_128_CBC_SHA | AES128-SHA | PFS + GPP PFS + Cert RSA + Cert |
| 0x33 | TLS_DHE_RSA_WITH_AES_128_CBC_SHA | DHE-RSA-AES128-SHA | PFS + GPP PFS + Cert |
| 0x35 | TLS_RSA_WITH_AES_256_CBC_SHA | AES256-SHA | PFS + GPP PFS + Cert RSA + Cert |
| 0x39 | TLS_DHE_RSA_WITH_AES_256_CBC_SHA | DHE-RSA-AES256-SHA | PFS + GPP PFS + Cert |
| 0x3C | TLS_RSA_WITH_AES_128_CBC_SHA256 | AES128-SHA256 | PFS + GPP PFS + Cert RSA + Cert |
| 0x3D | TLS_RSA_WITH_AES_256_CBC_SHA256 | AES256-SHA256 | PFS + GPP PFS + Cert RSA + Cert |
| 0x67 | TLS_DHE_RSA_WITH_AES_128_CBC_SHA256 | DHE-RSA-AES128-SHA256 | PFS + GPP PFS + Cert |
| 0x6B | TLS_DHE_RSA_WITH_AES_256_CBC_SHA256 | DHE-RSA-AES256-SHA256 | PFS + GPP PFS + Cert |
| 0x9C | TLS_RSA_WITH_AES_128_GCM_SHA256 | AES128-GCM-SHA256 | PFS + GPP PFS + Cert RSA + Cert |
| 0x9D | TLS_RSA_WITH_AES_256_GCM_SHA384 | AES256-GCM-SHA384 | PFS + GPP PFS + Cert RSA + Cert |
| 0x9E | TLS_DHE_RSA_WITH_AES_128_GCM_SHA256 | DHE-RSA-AES128-GCM-SHA256 | PFS + GPP PFS + Cert |
| 0x9F | TLS_DHE_RSA_WITH_AES_256_GCM_SHA384 | DHE-RSA-AES256-GCM-SHA384 | PFS + GPP PFS + Cert |
| 0x1301 | TLS_AES_128_GCM_SHA256 | TLS_AES_128_GCM_SHA256 | PFS + GPP PFS + Cert |
| 0x1302 | TLS_AES_256_GCM_SHA384 | TLS_AES_256_GCM_SHA384 | PFS + GPP PFS + Cert |
| 0x1303 | TLS_CHACHA20_POLY1305_SHA256 | TLS_CHACHA20_POLY1305_SHA256 | PFS + GPP PFS + Cert |
| 0xC007 | TLS_ECDHE_ECDSA_WITH_RC4_128_SHA | ECDHE-ECDSA-RC4-SHA | PFS + GPP |
| 0xC008 | TLS_ECDHE_ECDSA_WITH_3DES_EDE_CBC_SHA | ECDHE-ECDSA-DES-CBC3-SHA | PFS + GPP |
| 0xC009 | TLS_ECDHE_ECDSA_WITH_AES_128_CBC_SHA | ECDHE-ECDSA-AES128-SHA | PFS + GPP |
| 0xC00A | TLS_ECDHE_ECDSA_WITH_AES_256_CBC_SHA | ECDHE-ECDSA-AES256-SHA | PFS + GPP |
| 0xC011 | TLS_ECDHE_RSA_WITH_RC4_128_SHA | ECDHE-RSA-RC4-SHA | PFS + GPP PFS + Cert |
| 0xC012 | TLS_ECDHE_RSA_WITH_3DES_EDE_CBC_SHA | ECDHE-RSA-DES-CBC3-SHA | PFS + GPP PFS + Cert |
| 0xC013 | TLS_ECDHE_RSA_WITH_AES_128_CBC_SHA | ECDHE-RSA-AES128-SHA | PFS + GPP PFS + Cert |
| 0xC014 | TLS_ECDHE_RSA_WITH_AES_256_CBC_SHA | ECDHE-RSA-AES256-SHA | PFS + GPP PFS + Cert |
| 0xC023 | TLS_ECDHE_ECDSA_WITH_AES_128_CBC_SHA256 | ECDHE-ECDSA-AES128-SHA256 | PFS + GPP |
| 0xC024 | TLS_ECDHE_ECDSA_WITH_AES_256_CBC_SHA384 | ECDHE-ECDSA-AES256-SHA384 | PFS + GPP |
| 0xC027 | TLS_ECDHE_RSA_WITH_AES_128_CBC_SHA256 | ECDHE-RSA-AES128-SHA256 | PFS + GPP PFS + Cert |
| 0xC028 | TLS_ECDHE_RSA_WITH_AES_256_CBC_SHA384 | ECDHE-RSA-AES256-SHA384 | PFS + GPP PFS + Cert |
| 0xC02B | TLS_ECDHE_ECDSA_WITH_AES_128_GCM_SHA256 | ECDHE-ECDSA-AES128-GCM-SHA256 | PFS + GPP |
| 0xC02C | TLS_ECDHE_ECDSA_WITH_AES_256_GCM_SHA384 | ECDHE-ECDSA-AES256-GCM-SHA384 | PFS + GPP |
| 0xC02F | TLS_ECDHE_RSA_WITH_AES_128_GCM_SHA256 | ECDHE-RSA-AES128-GCM-SHA256 | PFS + GPP PFS + Cert |
| 0xC030 | TLS_ECDHE_RSA_WITH_AES_256_GCM_SHA384 | ECDHE-RSA-AES256-GCM-SHA384 | PFS + GPP PFS + Cert |
| 0xCCA8 | TLS_ECDHE_RSA_WITH_CHACHA20_POLY1305_SHA256 | ECDHE-RSA-CHACHA20-POLY1305 | PFS + GPP PFS + Cert |
| 0xCCA9 | TLS_ECDHE_ECDSA_WITH_CHACHA20_POLY1305_SHA256 | ECDHE-ECDSA-CHACHA20-POLY1305 | PFS + GPP |
| 0xCCAA | TLS_DHE_RSA_WITH_CHACHA20_POLY1305_SHA256 | DHE-RSA-CHACHA20-POLY1305 | PFS + GPP PFS + Cert |
Session key forwarder options
You can configure the session key forwarder by editing the /opt/extrahop/etc/extrahop-key-forwarder.conf file.
| Important: | If you add options to
extrahop-key-forwarder.conf that do not have dedicated variables, they
must be in the ADDITIONAL_ARGS field. For
example:ADDITIONAL_ARGS="-v=true -libcrypto=/some/path/libcrypto.so -libcrypto=/some/other/path/libcrypto.so" |
| Option | Description |
|---|---|
| -cert <path> | Specifies the path to the server certificate. Only specify this option if the server certificate is not signed by a trusted certificate authority. |
| -containerd-enable | Enables the enumeration of containers managed with the containerd runtime. This option is disabled by default. You must type -containerd-enable to enable containerd support. |
| -containerd-socket <string> | The full path of the containerd socket file. |
| -containerd-state <string> | The full path of the containerd state directory. |
| -containerd-state-rootfs-subdir <string> | The relative path of the rootfs subdirectory of the containerd state directory. |
| -docker-enable | Enables the enumeration of Docker containers. This option is enabled by default. You must type -docker-enable=false to disable Docker support. |
| -docker-envoy <path> | Specifies additional Envoy paths within Docker containers. You can specify this option multiple times. |
| -docker-go-binary <value> | Specifies glob patterns to find Go binaries within Docker containers. You can specify this option multiple times. |
| -docker-libcrypto <path> | Specifies the path to libcrypto within Docker containers. You can specify this option multiple times. |
| -envoy <path> | Specifies additional Envoy paths on the host. You can specify this option multiple times. |
| -go-binary <value> | Specifies glob patterns to find Go binaries. You can specify this option multiple times. |
| -hearbeat-interval | Specifies the time interval in seconds between heartbeat messages. The default interval is 30 seconds. |
| -host-mount-path <path> | Specifies the path where the host file system is mounted when running the session key forwarder inside a container. |
| -hosted <platform> | Specifies that the agent is running in the specified hosted platform. The platform is currently limited to aws. |
| -ldconfig-cache <path> | Specifies the path to the ldconfig cache, ld.so.cache. The default path is /etc/ld.so.cache. You can specify this option multiple times. |
| -libcrypto <path> | Specifies the path to the OpenSSL library, libcrypto. You can specify this option multiple times if you have multiple installations of OpenSSL. |
| -no-docker-envoy | Disables Envoy support within Docker containers. |
| -no-envoy | Disables Envoy support on the host. |
| -openssl-discover | Automatically discovers libcrypto implementations. The default value is "true". You must type -openssl-discover=false to disable OpenSSL decryption. |
| -pidfile <path> | Specifies the file where this server records its process ID (PID). |
| -port <value> | Specifies the TCP port that the sensor is listening on for forwarded session keys. The default port is 4873. |
| -server <string> | Specifies the fully qualified domain name of the ExtraHop Discover appliance. |
| -server-name-override <value> | Specifies the subject name from the sensor certificate. Specify this option if this server can only connect to the packet sensor by IP address. |
| -syslog <facility> | Specifies the facility sent by the key forwarder. The default facility is local3. |
| -t | Perform a connectivity test. You must type -t=true to run with this option. |
| -tcp-listen-port <value> | Specifies the TCP port that the key forwarder is listening on for forwarded session keys. |
| -username <string> | Specifies the user that the session key forwarder runs under after the forwarder software is installed. |
| -v | Enable verbose logging. You must type -v=true to run with this option. |
Linux environment variables
The following environment variables enable you to install the session key forwarder without user interaction.
| Variable | Description | Example |
|---|---|---|
| EXTRAHOP_CONNECTION_MODE | Specifies the connection mode to the session key receiver. Options are direct for self-managed sensors and hosted for ExtraHop-managed sensors. | sudo EXTRAHOP_CONNECTION_MODE=hosted rpm --install extrahop-key-forwarder.x86_64.rpm |
| EXTRAHOP_EDA_HOSTNAME | Specifies the fully qualified domain name of the self-managed sensor. | sudo EXTRAHOP_CONNECTION_MODE=direct EXTRAHOP_EDA_HOSTNAME=host.example.com dpkg --install extrahop-key-forwarder_amd64.deb |
| EXTRAHOP_LOCAL_LISTENER_PORT | The key forwarder receives session keys locally from the Java environment through a TCP listener on localhost (127.0.0.1) and the port specified in the LOCAL_LISTENER_PORT field. We recommended that this port remain set to the default of 598. If you change the port number, you must modify the -javaagent argument to account for the new port. | sudo EXTRAHOP_CONNECTION_MODE=direct EXTRAHOP_EDA_HOSTNAME=host.example.com EXTRAHOP_LOCAL_LISTENER_PORT=900 rpm --install extrahop-key-forwarder.x86_64.rpm |
| EXTRAHOP_SYSLOG | Specifies the facility, or machine process, that created the syslog event. The default facility is local3, which is system daemon processes. | sudo EXTRAHOP_CONNECTION_MODE=direct EXTRAHOP_EDA_HOSTNAME=host.example.com EXTRAHOP_SYSLOG=local1 dpkg --install extrahop-key-forwarder_amd64.deb |
| EXTRAHOP_ADDITIONAL_ARGS | Specifies additional key forwarder options. | sudo EXTRAHOP_CONNECTION_MODE=hosted EXTRAHOP_ADDITIONAL_ARGS="-v=true -libcrypto=/some/path/libcrypto.so libcrypto=/some/other/path/libcrypto.so" rpm --install extrahop-key-forwarder.x86_64.rpm |
Thank you for your feedback. Can we contact you to ask follow up questions?