This procedure describes how to replace a 120 GB packet capture SSD with a 480 GB SSD
in the EDA 6200, EDA 8200, EDA 9200, and EDA 10200 appliances.
-
Log in to the Administration settings on the ExtraHop system through
https://<extrahop-hostname-or-IP-address>/admin.
-
In the Appliance Settings section, click Disks.
-
In the Packet Capture section, next to SSD Assisted Packet
Capture, click Configure.
-
Click Remove Disk.
-
Select Quick Format or Secure
Erase and then click Remove.
After this step is complete, it is safe for you to remove the disk from
the appliance.
-
Remove the front bezel. Press and hold the release button on the left end of
the bezel and swing the bezel slightly to the right. Gently pull the bezel
forward until it disconnects from the USB connector on the right side of the
appliance.
-
Remove the 120 GB drive. The drive is located in the following slot for each
appliance.

EDA 8200 - Slot 8

EDA 9200 and EDA 10200 - Slot 14

-
Insert the new 480 GB drive into the same slot where the previous drive was
installed.
-
Return to the Administration settings.
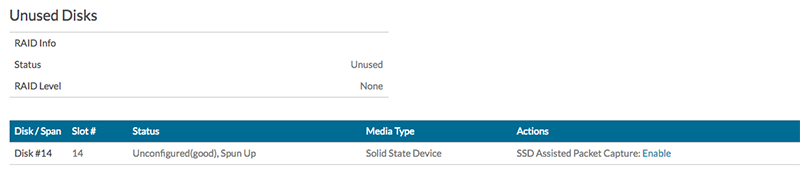
-
In the Unused Disks section, next to SSD
Assisted Packet Capture, click
Enable.
-
Click OK to add the packet capture disk
Thank you for your feedback. Can we contact you to ask follow up questions?