Install the SSL Decryption Board
The following procedures explain how to install the SSL decryption card in an ExtraHop Discover appliance.
The SSL decryption board comes pre-installed in all new rack-mounted Discover appliance hardware.
Shut down the system
Before you open the Discover appliance, shut down the system and disconnect the appliance from the electrical outlet.
- Log in to the Administration settings on the ExtraHop system through https://<extrahop-hostname-or-IP-address>/admin.
- In the Appliance Settings section, click Shutdown or Restart.
- Click Shutdown.
- On the confirmation page, click Shut down.
- Disconnect the Discover appliance from the electrical outlet.
Remove the cover
The cover protects the components inside the Discover appliance and helps maintain internal air flow. Removing the cover actuates the intrusion switch, which helps maintain system security.
Install the card
The SSL card must be installed in the correct slot to function correctly. The slots are labeled on the rear of the appliance.
-
Close the expansion card latch.
Installing the SSL card into the expansion card riser in the EDA 9100
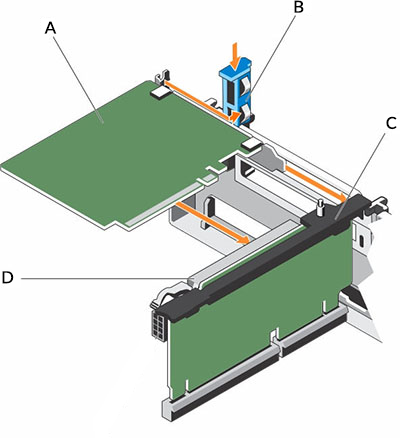
- A
- SSL decryption card
- B
- Expansion card latch
- C
- Expansion card riser
- D
- Expansion card connector
Thank you for your feedback. Can we contact you to ask follow up questions?